How to Install ILVE Easy Glide Oven Racks in 7 Simple Steps
ILVE Easy Glide Oven Racks are a standout feature of any ILVE range, offering exceptional quality and performance. Known for their durable, high-end design and cooking versatility, ILVE ranges are built to provide top-notch results. The Easy Glide oven racks take it a step further by offering enhanced flexibility and smoothness when pulling out heavy dishes or adjusting racks during cooking. These easy-glide steel racks make it easier to access your dishes, reduce the effort needed to move racks, and ultimately enhance your cooking experience with greater ease and convenience.
Installing these oven racks is a simple process that you can do yourself with minimal tools, and in this guide, we will walk you through every step to ensure that your ILVE Easy Glide oven racks are installed correctly. Whether you’re a seasoned cook or just getting started with your new range, mastering the installation of your Easy Glide racks will enhance your kitchen experience.
Why is Installing Easy Glide Oven Racks Important?
Before diving into the installation process, it’s important to understand why these oven racks are such a valuable addition to your ILVE range. The Easy Glide oven racks are designed to move smoothly in and out of your oven without resistance, reducing the risk of spills and burns when accessing your food. They are particularly helpful when you’re cooking multiple dishes at once or when you need to adjust the racks to accommodate different-sized pans. This feature is incredibly useful for baking, roasting, or broiling, where the ability to easily maneuver racks can make all the difference.
Not only do these racks make your cooking more efficient and safer, but they also provide flexibility. You can move the racks up or down within the oven to suit your needs, and because they glide effortlessly, it’s much easier to work with heavier items without worrying about the racks getting stuck or unbalanced.
Step-by-Step Replacement Process
-
-
Step 1: Remove the Oven Rack
The first step in installing your ILVE Easy Glide oven racks is to remove the existing rack from the oven. This will make it easier to install the extension glides and ensure there is no obstruction when working with the oven’s interior.
- Gently pull the current oven rack out of the oven. Be careful not to force it if it’s stuck—sometimes a gentle wiggle will release it.
- Once the rack is removed, set it aside in a safe space where it won’t be damaged.
Removing the existing rack gives you the space you need to fit the extension glides properly.
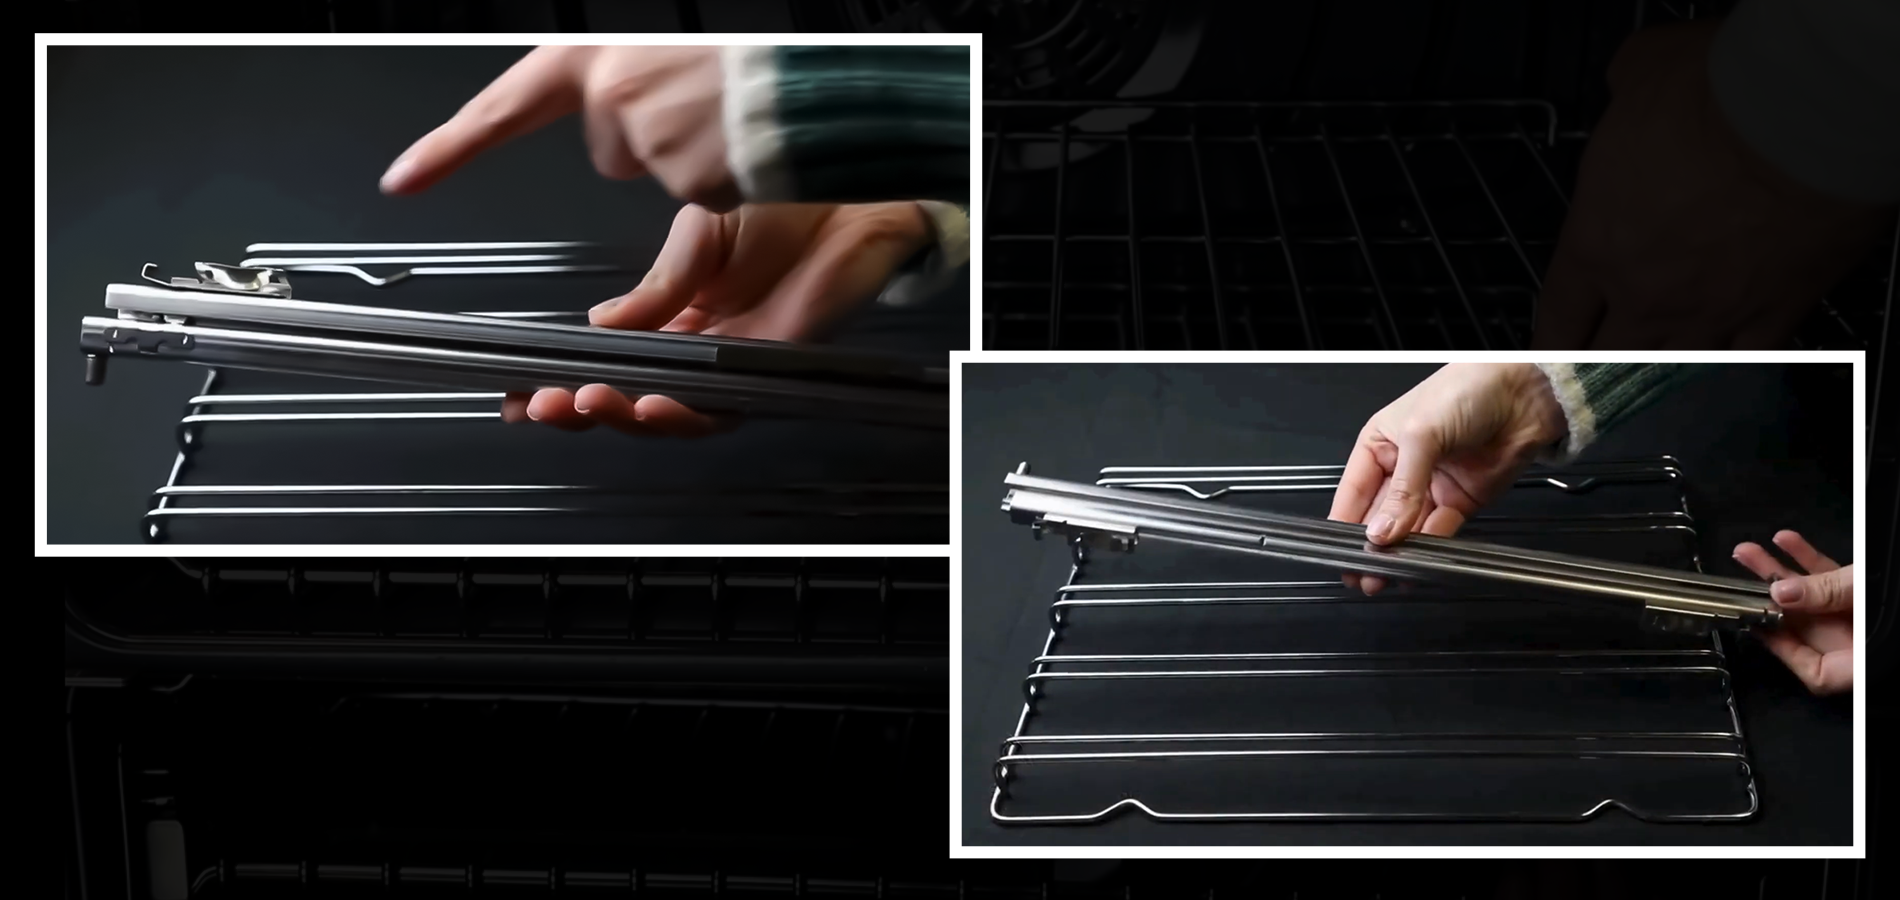
Step 2: Place the Glides Between Any of the Rack’s Tines
Now that the oven rack is removed, it’s time to install the extension glides. These glides are designed to provide smooth movement for your oven racks, making them much easier to adjust.
- Take the extension glides and hold them at the appropriate level for where you want to install the new rack.
- Position the glides between the tines of the rack. The tines are the metal supports that run along the sides of the oven rack, so ensure that the glides are placed correctly in the space between them.
- Make sure the extension glides are centered on the rack and aligned with the tines for easy installation.
This step is essential as it ensures the glides are placed in the right position to support smooth movement once the oven rack is in place.
Step 3: Point the Connectors to the End of the Tines
Once the extension glides are positioned properly, the next step is to connect them securely to the rack.
- Look for the connectors at the ends of the extension glides. These connectors are the parts that will lock into place to ensure the glides stay firmly attached to the rack.
- Point the connectors towards the end of the tines. It’s important that the connectors are properly aligned with the ends of the tines to ensure that the glides lock into place correctly.
- Double-check that the connectors are facing the right way before proceeding.
This step ensures that the glides will be properly attached and locked in place for secure and safe operation.
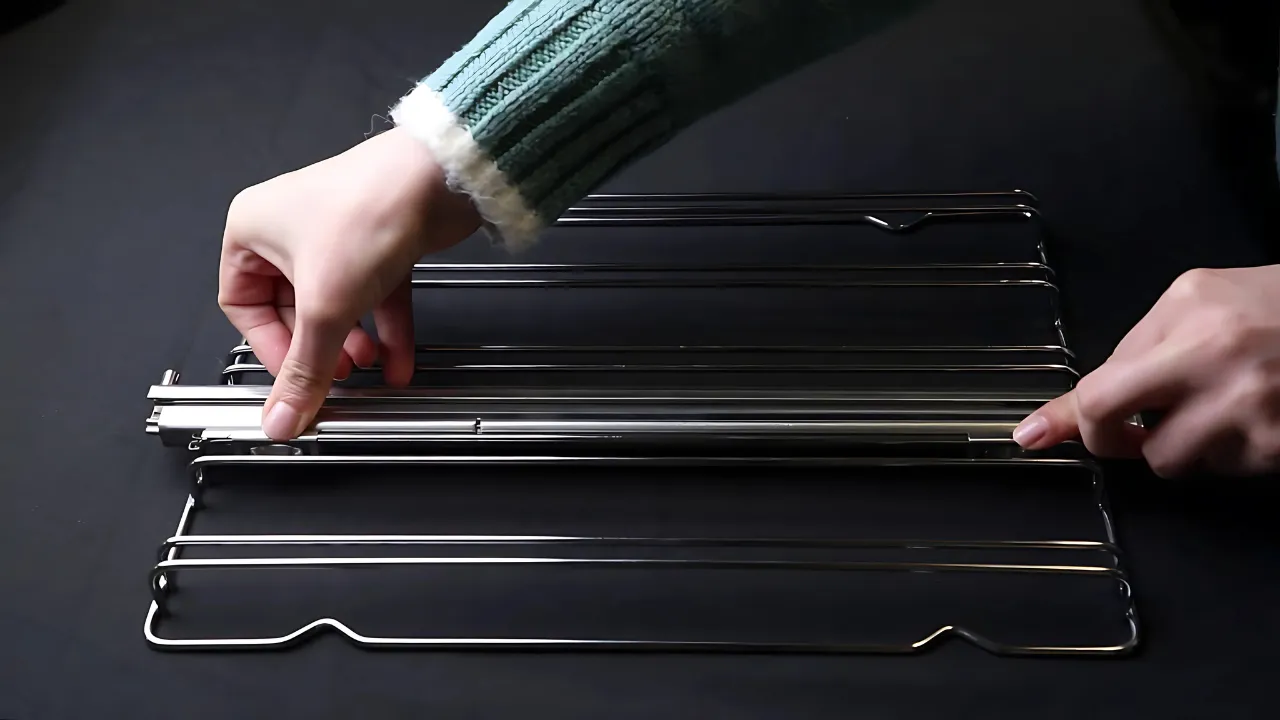
Step 4: Push the Glide to Lock It in Place
With the extension glides aligned and the connectors pointing towards the end of the tines, it’s time to secure them in place.
- Firmly push the extension glide towards the rack to lock it in position. You should feel the glides click or lock into place when they are properly installed.
- Take a moment to ensure the glide is securely fastened. Gently pull on the rack to confirm that it is locked into place and won’t slip or come off during use.
This step is crucial as it ensures that the glides are securely attached and will provide smooth, reliable movement during use.
Step 5: Easy-Glide Steel Oven Racks Make a Fine Accessory for Any ILVE Range
Now that the glides are securely installed, it’s time to place your Easy Glide oven racks in the oven. These high-quality racks are designed to fit seamlessly into your ILVE range, making them a great addition to your cooking experience.
- Take the Easy Glide oven racks and gently slide them into the oven. The glides should allow the racks to move smoothly in and out of the oven, reducing any resistance.
- You’ll find that these racks provide a noticeable improvement in ease of movement compared to traditional oven racks, making them an essential accessory for your ILVE range.
These racks are built to withstand high temperatures and heavy use, making them a durable and practical addition to your cooking setup.
Step 6: The Racks Can Be Installed in Any Position Within the Oven
One of the key benefits of the ILVE Easy Glide oven racks is the flexibility they offer. The racks can be easily installed in any position within the oven, allowing you to adjust them to suit your cooking needs.
- Simply slide the Easy Glide racks into the desired position within the oven. The smooth movement of the racks makes it easy to adjust their height and position without worrying about resistance.
- Whether you’re baking, roasting, or broiling, being able to adjust the racks gives you greater control over your cooking environment and results.
This flexibility makes the Easy Glide oven racks a versatile and valuable tool in your kitchen.
Step 7: Removing or Replacing the Racks for Greater Flexibility
One of the most useful features of the ILVE Easy Glide oven racks is their ability to be removed or replaced, offering even more flexibility when baking, roasting, or broiling.
- If you need to adjust the rack for a different cooking task, simply remove the rack by pulling it out of the oven.
- You can replace it with a different rack in the oven or adjust its position for optimal cooking performance.
- The Easy Glide racks are designed to be easily removable and replaceable, so you can switch things up depending on your cooking needs.
This step ensures that your oven racks can adapt to any recipe or cooking style, providing ultimate convenience.
-

Final Recommendations
- Refer to the full ILVE installation manual for clearance requirements and connection guidelines.
- Always hire a licensed professional for gas and electrical installations.
- Register your ILVE Range online to activate your warranty and receive product support.
Need further assistance? Visit us.ilve.com or contact our support team.

